Mr Robin

For my mother’s Christmas present I have crocheted a robin hot water bottle cover. She is obsessed with them since my father passed away and always says “There’s dad in the garden” whenever a robin appears. They are the cutest birds and I wanted something special for her. I just love him and his little feet.


7642A177-713B-4F38-963B-F898C901D68B.jpeg

Hat and mittens!

86108251-ce51-4d7b-b4f4-d4ef4de8adeb.jpeg
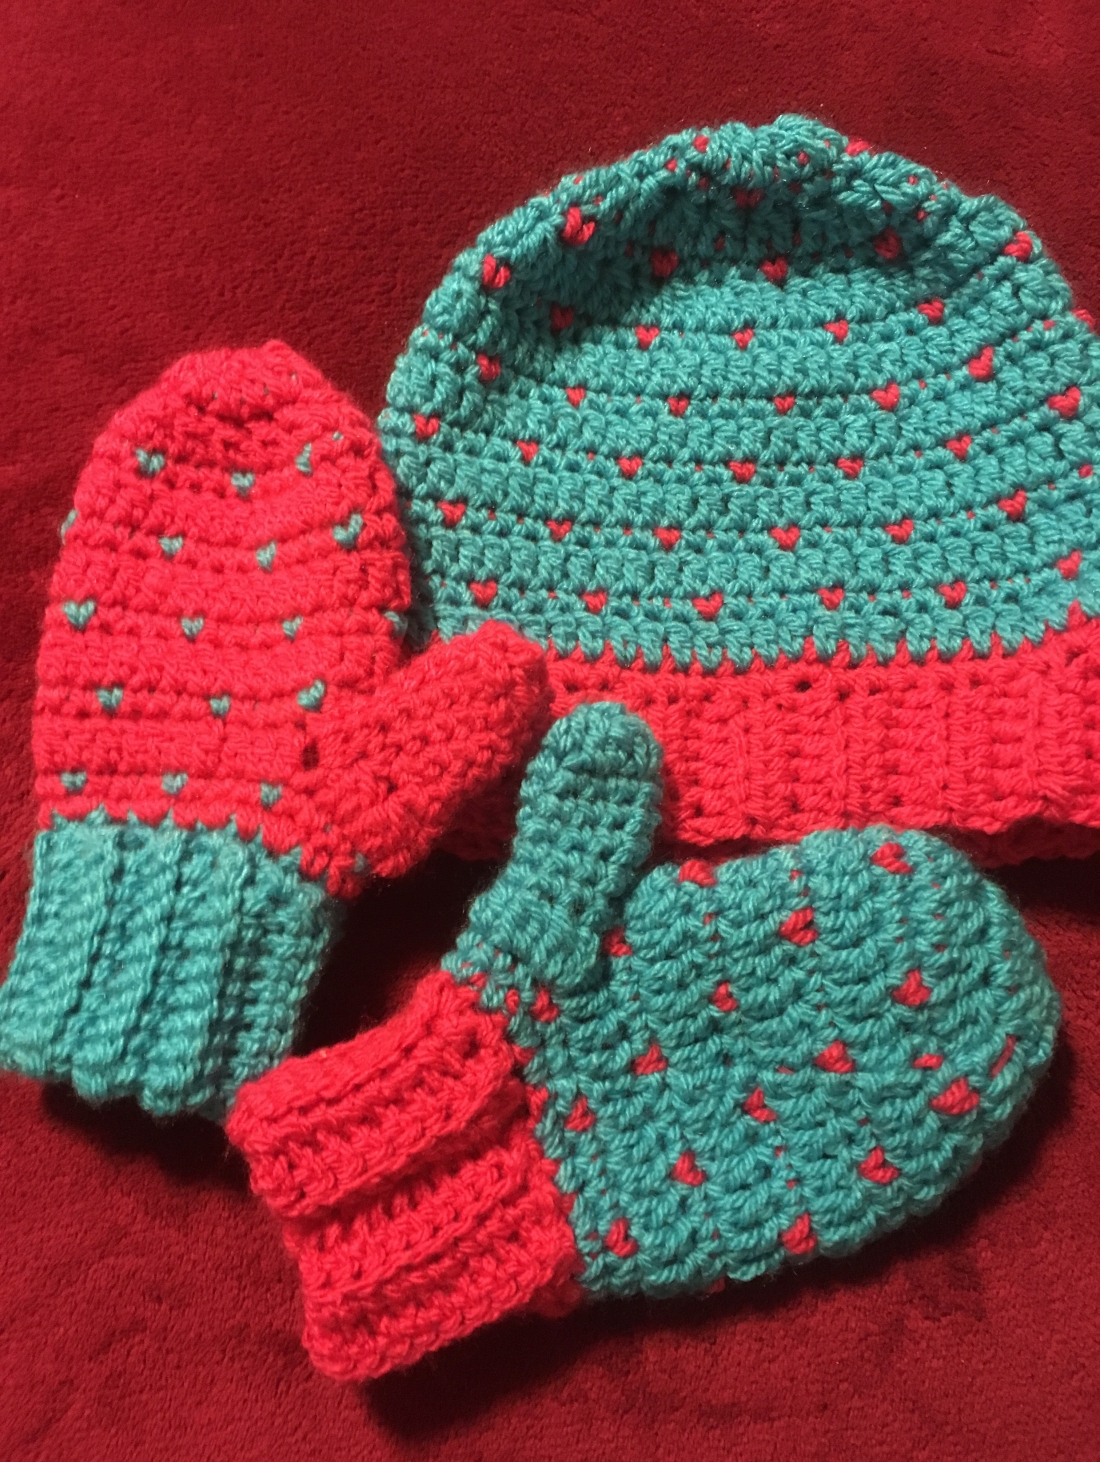
Thanks to the lovely blog Whistle and Ivy, I have managed to make up these for my daughter and now she can wear them to school tomorrow. Check out the blog: https://www.whistleandivy.com/2017/01/crochet-snowfall-slouchy-hat.html


Enjoy the lovely free patterns on offer!


Xmas decoration #5!

3955E848-23CF-4B15-BD84-946B6D133842.jpegimage.jpg
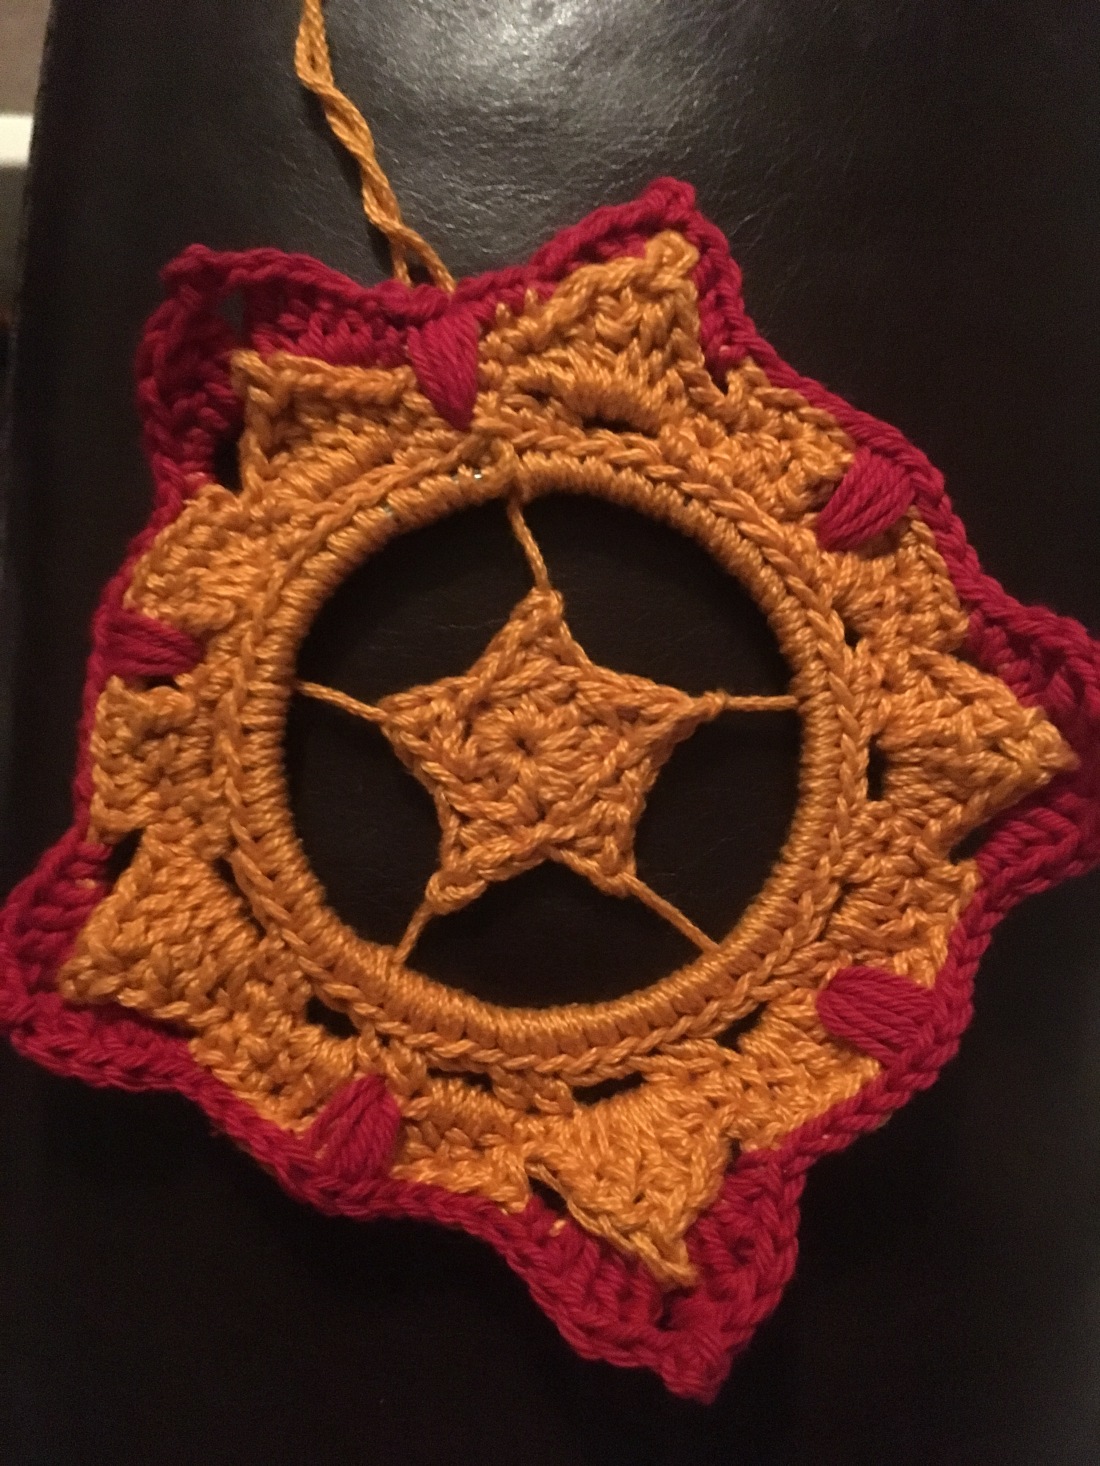
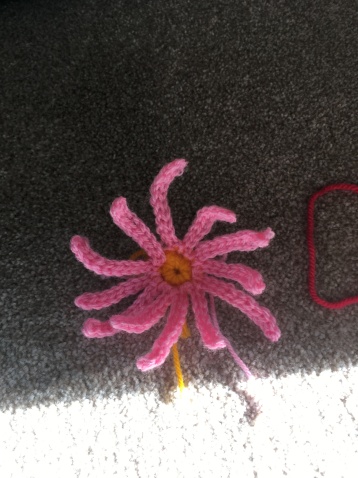
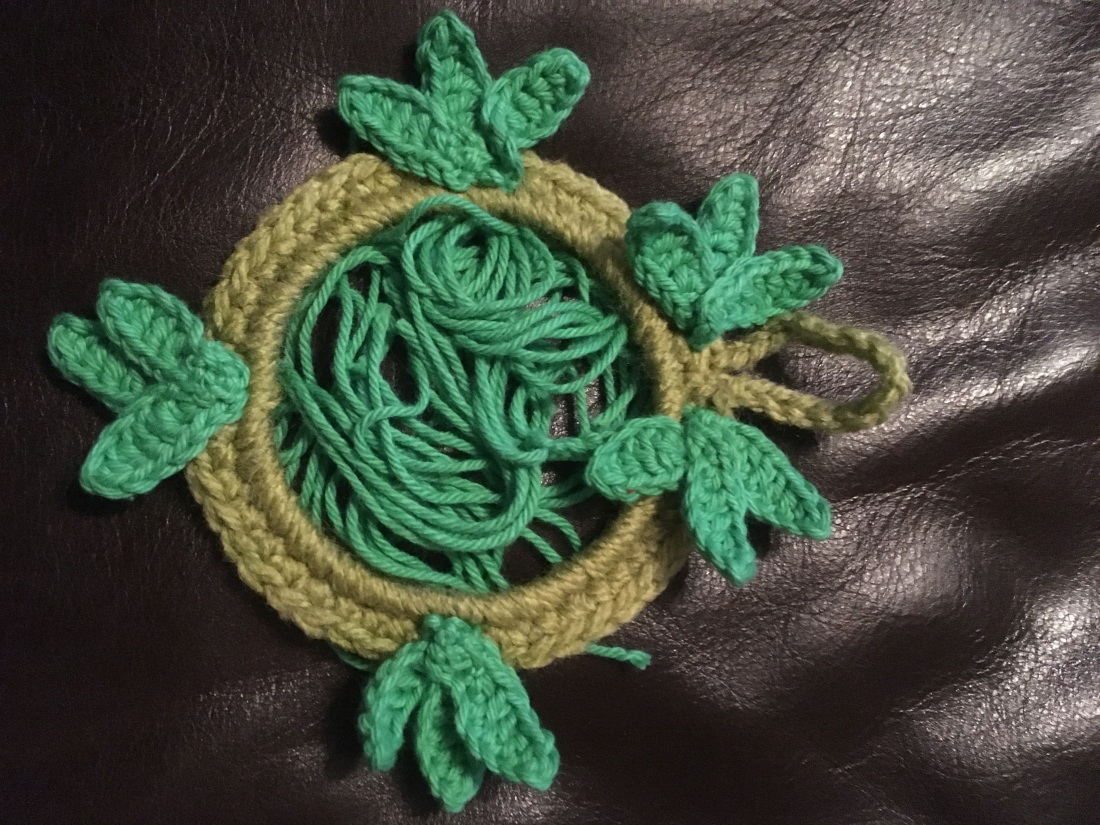
Not really sure what it is, a bit of free-form crochet! I really like it and used another of my charity shop bangles. I have started another one which should look somewhat like a wreath and I am designing some small poinsettias to glam it up. My weekend has solely been dedicated to crocheting, watching The Pacific and also drying rose petals in prep for my homemade soaps. I still need to get Epsom salts as well to make salt scrubs. I am planning to make gifts for couples, just spa and yummy goodies. I am still trying to get a permanent job so I need to make gifts to save money. Four years of training and still no job, I hope it happens soon. There’s only so many craft projects to keep me occupied throughout the day! Well that’s my rant and I will share some more projects this week.

Now there were four!

So this week has been quite busy! I have managed to make 3 jars of piccalilli and I have just finished cooking mincemeat for 3 hours. It’s Delia Smith’s xmas recipe for mincemeat so we shall see how it tastes but it needs to be placed in jars after I add the booze! I am swithering in between using whiskey instead of brandy, see what the hubby thinks because it will be his whiskey I use! My mother swears by Delia so I will test it out. Also to add to the Christmas theme, I have completed four xmas decorations. Two are from patterns which I will share and the other two are my own creation. Let me know what you think, there are some great patterns out there and inspiration to make your own. I love Christmas as you can tell! So the xmas bauble is from a vid on you tube: https://youtu.be/kjZc4nmZyow

And the tree is from: http://anabeliahandmade.blogspot.co.uk/

I still need to block the tree. The wreath with a mini star is my own make and I used a bangle, I bought at lease fifty from the charity shop for a £1!

My fourth decoration is going to be an elf but I need to put him together before sharing with everyone.

See you later!


Crocheted xmas ornament glove pattern…

Sorry for the delay in adding the pattern but the weekend has been full on! I had my graduation ceremony on Friday and the weekend has been filled with family gatherings. It was such a wonderful day and one that I won’t forget too quickly. So no more training wheels as I am now officially a fully fledged nurse! Argghhh!!!!!

Onto the pattern…

Tools:


Abbreviations and stitch instructions:

Sc – single crochet

Sl st – slip stitch

Ch – chain

Dec – decrease

To do a decrease, place hook in sc and yarn over and pull through, insert hook into the next stitch, yarn over and pull through. You should have 3 loops on the hook, yarn over and pull through all three loops. One decrease done!


Pattern:

Ch 16 and sl st to join with the first ch to create a ring. (I used white yarn for this as it serves as the edging for the glove)

R1. Sc in each ch (16sc), sl st in the first sc and ch 1.

R2 – R3. Sc in each st as in R1 (16sc per row).

R4. Join the solid colour with a sl stitch, ch 1 and do 1 sc in each stitch for a total of 16sc.

R5 – R6. Ch1 and do 1 sc in each stitch as in R4 for a total of 16sc.

R7. Ch 1 and 1 sc in the next 5 sc. In the 6th, 7th and 8th stitch do 2 sc in each stitch (to shape the thumb), skip the next 6 stitches and sc in each of the remaining stitches.

R8, R9 & R10. Ch1 and 1 sc in each st (13sc), sl st in the first sc at the end of each row.

R11. Decrease row. 1 sc in first st, 1 decrease, 1 sc in the next st, 1 dec, 1sc, 1 dec, 1 sc, 1 dec and 1 sc (9sc). Sl st to the first sc.

R12. Final decrease row. 4 decreases, 1 sc  and then sl st to finish (5sc). Sew the hole closed to form the top of the glove.

The thumb:

R1. Attach the same solid colour on a stitch where you skipped 6 sc and do 1 sc in each stitch. You will gain a seventh stitch by placing your hook in the crook of the thumb (where you shaped using the two sc in the 6th, 7th and 8th stitch (see pic)) So you should have 7 sc at the end of the first row and then sl st to the first sc.  Hope that makes sense.

R2. Ch1 and 1 sc in the first stitch, decrease in the next, 1 sc,  1 dec and  1 sc (5sc). Finish off and sew up the hole.


Crafting countdown until xmas!

I have decided that in addition to making gifts for my loved ones, I felt that it would be nice to create new decorations for our Christmas tree. I am going to attempt to make my own and use the creations of other fellow crafters whilst sharing their links. I have had my tree since we bought it 9 years ago and it has had the same decorations as well. I really love them but I thought it would be nice for E and myself to create some of our own to make it a bit more special. I thought I might start with some mini crochet hats and mittens as they are always cute and then see where that takes me because time is moving on! November the 1st already and I haven’t even started. I will share some links to other great patterns and ideas as I go. Maybe share some of your creations too! My ideal goal would be to make one to two items per day which should be manageable, hah! Will keep everyone posted.

I am on flower!

Sorry…


I have made another flower, I am just experimenting as I go along and see the different styles of flowers on my beloved curtain fabric.

Apologies for the owl jammies but it was that kind of day if you know what I mean. There’s also a view of my kid’s feet sticking out from under the coffee table, poor thing had to stay home with a terrible sinus cold and decided to lie under the table. Your guess is as good as mine!

I have tried to take pictures of the steps I took to create a magic ring as well.

THE FLOWER

Tools:

Pattern:

Centre of flower (shown in the first pics using blue yarn but for the flower it would be the colour that you choose for the centre).

Start with a magic ring (see pics or check out the you tube video I shared in my previous spindly flower pattern), do 6sc into the magic ring and sl st to the first sc to join. Pull the loose end tight to close the centre of the ring.

Change colour for the petals and join new colour with a sl st to the first sc and *ch 11.

Sl st into the 2nd ch from hook, sc in 3rd chain, 1hdc in the next 6 stitches, sc in 10th ch and sl st into the bottom of the ch (the 1st sc).**

Sl st to the next sc and repeat the steps from *to** until you have six petals.


Hope you enjoy the pattern and I hope to have more as I go along.


Remember to share my pattern if you are using it and I also have a paypal donations link below should you wish to buy me a coffee for my efforts.


https://www.paypal.com/cgi-bin/webscr?cmd=_s-xclick&hosted_button_id=QM3HLGA252YSS


My spindly flower…

Another simple-ish flower, well I thought so but have a go and let me know so that I can refine the pattern.

IMG_3762

Tools:

  • 5.00mm crochet hook because I am using Aran yarn
  • Yarn, Paintbox Yarn Simply Aran (Marine Blue – 233 and Mustard Yellow – 223) Link: https://www.lovecrochet.com/paintbox-yarns-simply-aran
  • Needle for sewing in ends or attaching the flower to a project
  • Glue for attaching to a solid object

PATTERN:

Centre

Chain (ch) 3, slip stitch into the first chain to create a loop (or use the magic ring- link at the bottom of the page) and do 6 sc into the centre, finish by slip stitching into the first sc and tie off. Pull the centre tight to close the hole in the middle.

Petals

Join the new colour for the petals by slip stitching in the first sc of the centre piece to secure and *chain 9, slip stitch in the 2nd ch from the hook and all the way down the chain for a total of 8 slip stitches. At the bottom of the chain slip stitch to secure in the same sc and then chain another 11 chains in the same stitch. Sl st in the 2nd ch from the hook and all the way down for a total of 10 slip stitches. Slip stitch in the same sc stitch and slip stitch to the next sc**.

(See pics below for further clarification)

Repeat steps from * to **.

Once you reach the end you should have 12 spindly petals, 6 sets that are ch 9 (8 slip stitches) and 6 sets of ch 11 (10 slip stitches).


MAGIC CIRCLE TUTORIAL